While canvas is already a very useful tool and an excellent addition to Obsidian, it’s still missing some basic customization options. Until these features are added, this guide will provide some basic CSS to extend these options. Simply add any of these code examples into a new CSS Snippet.
Targeting specific canvas elements
To ensure our modifications don’t apply to every single element on our canvas, we need to add a custom CSS class to the YAML header of the note we have included in your canvas (it doesn’t have to be called canvasimage). This class can be used in as many notes as we want.
---
cssclass: canvasimage
---
We can then target any node in our canvas using the CSS :has() selector like so:
.canvas-node:has(.canvasimage) {
    // add CSS styling here
}
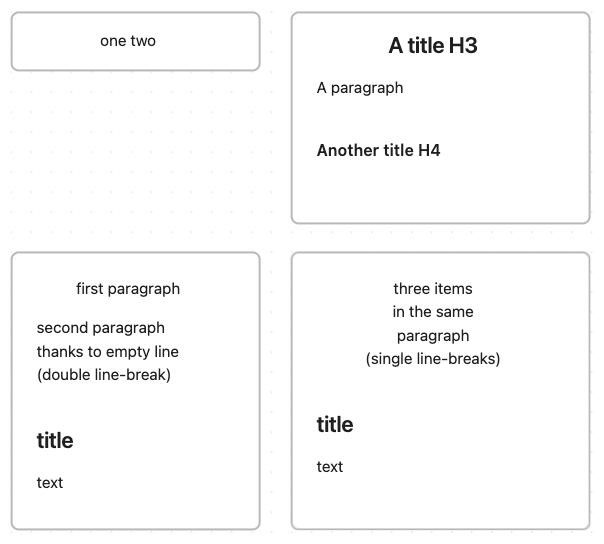
Customising Images
By default, Obsidian has the Show inline title option enabled. We can’t style images if we add them directly into the canvas, so we have to embed images into a note, and then add that note to the canvas. Disable this option so the note title doesn’t show above our image.

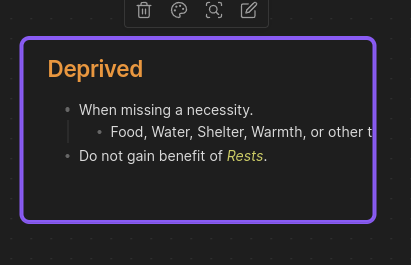
Removing a node border
.canvas-node-container:has(.canvasimage) {
    border: none;
}
Removing a node background
.canvas-node-container:has(.canvasimage) {
    background: none;
    box-shadow: none;
}
Removing a node label
.canvas-node:has(.canvasimage) .canvas-node-label {
    display: none;
}
Rotating a node
.canvas-node:has(.canvasimage) {
    transform:rotate(20deg);
}
20deg can be whatever value (in degrees) we want, including negative numbers
Removing the default rounded node corners
.canvas-node-container:has(.canvasimage) {
    border-radius: 0;
}
Removing the default padding between the image and the node border
.markdown-preview-view.canvasimage {
    padding: 0px !important;
    overflow: visible;
}
.markdown-preview-view.canvasimage::before {
    display: none !important;
}
.markdown-preview-view.canvasimage p {
    margin: 0 !important;
}
Additional CSS for rotating text
Because of some rendering optimization weirdness, we need to add the following CSS to any note with text, or the text will get blurry and difficult to read when it’s rotated:
.canvas-node-container:has(.canvastext) {
    overflow: visible;
    contain: none;
}
.canvas-node-content:has(.canvastext) {
    will-change: transform;
}
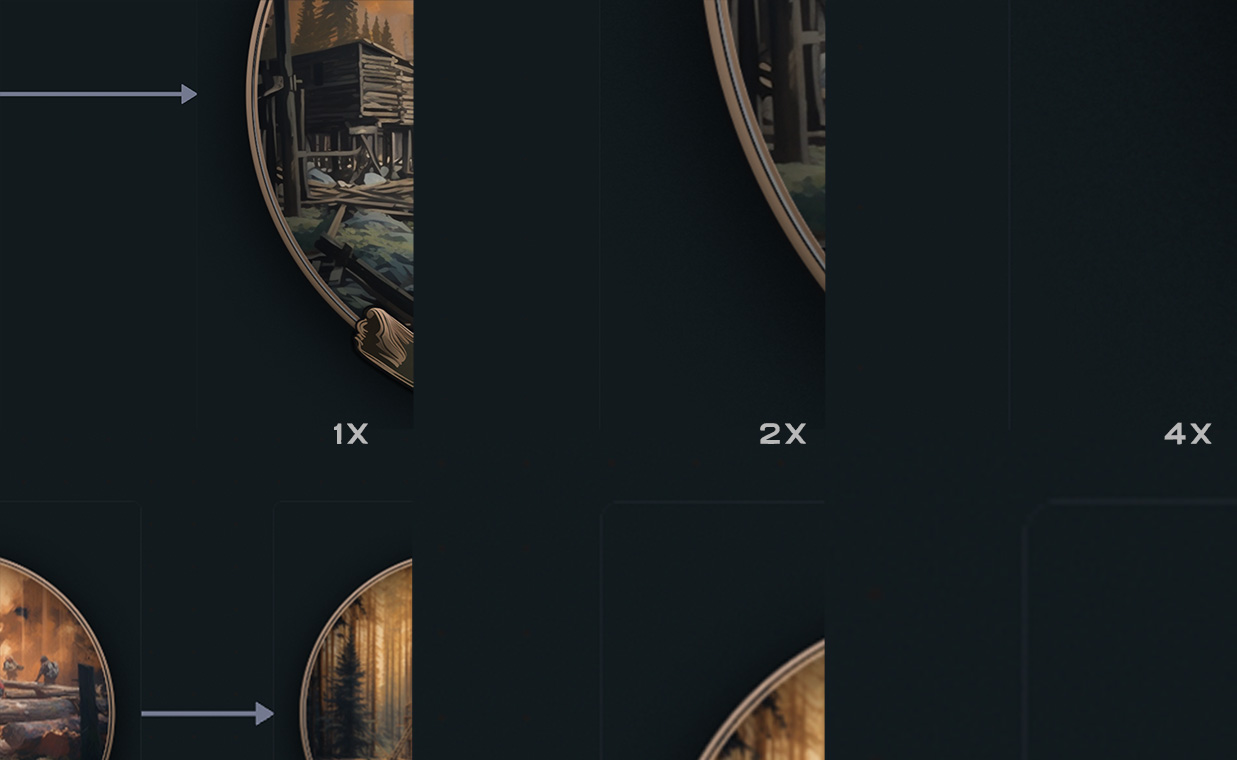
Adding an image background to our canvas
This is a bit hacky, but it works reasonably well in most cases - what we’re doing is creating a pseudo-element of our canvas element, and expanding it to be much bigger than our viewport. It’s not infinite, but we can expand it as much as we want.
.canvas {
    position: relative;
}
.canvas::before {
    --image-scale: 25%;
    --background-scale: 500%;
    content: "";
    width: var(--background-scale);
    height: var(--background-scale);
    background: url("https://i.imgur.com/DtGQ9Em.jpg");
    position: absolute;
    top: calc(-1 * var(--background-scale)/2 + 50%);
    left: calc(-1 * var(--background-scale)/2 + 50%);
    background-size: var(--image-scale);
}
In this example, we change the background to a tiling leather texture. To replace this, we can simply replace the url in the background property and fiddle with the --image-scale and --background-scale properties until it looks how we want
NOTE: This background will appear on all canvases. If we want it to only appear on a specific canvas, we need to use the :has() selector on a node that only appears in that canvas - eg:
.canvas:has(.canvasimage) {
  position: relative;
}
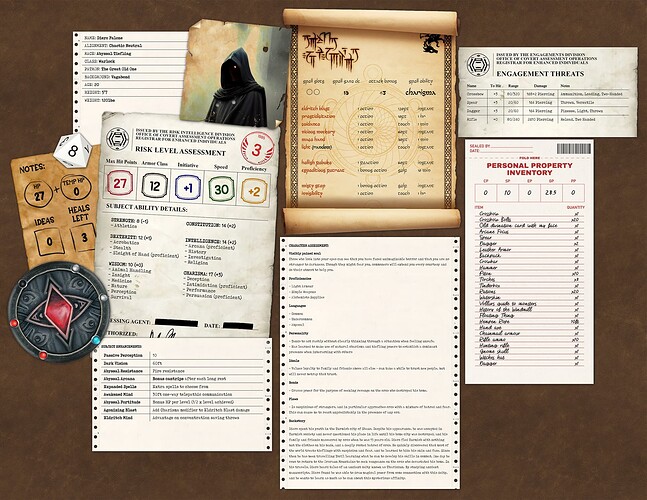
For some inspiration on what sort of things are currently possible to achieve using snippets, check out my DnD Character Sheet Design (made using Canvas & Snippets)