Side-by-Side Images

Side-by-Side Images

I’m trying to see images across the page for spatial simplicity and function; I like to make mood boards and use images/graphics to illustrate concepts.

Proposed solution

I wish I knew programming, which if I did, I may see this as what it is - impossible in markup files but I hope it’s not.

Current workaround

All I’m doing now is making the pixel size around [|200] and stacking them.


I didn’t find any requests like this. Thank you for considering.

26 Likes

I like this idea, I definetly see the value in making more out of images in these type of layouts.

Would spliting the screen in various vertical and horizontal splits work?

I’ll play around with this idea, would love to see if anyone else has solutions, or plugin ideas for this

2 Likes

Might a table work?

Else, I imagine there’s an inline HTML solution to this. Hmm…

7 Likes

Thanks for getting back Ryan. I’m new to Obsidian so haven’t played with tables yet but I’ll give it a shot later as I keep going through the help vault.

I don’t program - whats does an inline HTML solution consist of?

I don’t think it would achieve the functionality I’m looking for.

A table only works if you don’t specify the image size, since it reads the " | " as a cell division. It’s a solution but not a great one…

2 Likes

I had a similar need and managed to make it work with tables :

2x1 grid with web images :

|<img src="http://lorempixel.com/200/200/" width="200" />|<img src="http://lorempixel.com/200/200/" width="200" />|
|-|-

2x1 grid with attachments:

|![[myfilename.png\|200]]|![[myfilename.png\|200]]|
|-|-

3x4 grid with attachments :

|![[myfilename.png\|200]]|![[myfilename.png\|200]]|![[myfilename.png\|200]]|
|-|-|-
|![[myfilename.png\|200]]|![[myfilename.png\|200]]|![[myfilename.png\|200]]|
|![[myfilename.png\|200]]|![[myfilename.png\|200]]|![[myfilename.png\|200]]|
|![[myfilename.png\|200]]|![[myfilename.png\|200]]|![[myfilename.png\|200]]|
5 Likes

@Janek You can use \ to escape the | for image size, so you can use sizes in tables! As per @GeekB’s example.

@joshuawilliam, inline HTML and added CSS is a little tricky and requires some convoluted workarounds (e.g., you need to write a few different HTML statements to make it work, and I think your images need to be hosted on the web). Try the table solution first!

7 Likes

@GeekB - just what I was looking for, this is great. Thank you.

Thanks for your correspondence, Ryan.

1 Like

Check out @GeekB’s solution. It’s perfect I think.

1 Like

You could try this (nb it needs some text before it: a full-stop suffices, as per this eg)

.<div style="float: left; padding: 0px 2px 0px 0px;">![[Pasted image 1.png|100]] </div><div style="float: left; padding: 0px 2px 0px 0px;">![[Pasted image 2.png|100]] </div><div style="float: left; padding: 0px 2px 0px 0px;">![[Pasted image 3.png|100]] </div><div style="float: left; padding: 0px 2px 0px 0px;">![[Pasted image 4.png|100]] </div>

Getting out of it is a bit tricky though. You need to add text after this code till you have passed it - a full-stop on successive lines will do it with minimal aesthetic impact.

4 Likes

oh wow, an even better solution - even the padding can be manipulated in 4 directions. Thank you very much @Jeffurry.

How far can this go? You’ve done four inputs here, all with a left padding.

How do I amend the spaces so the alignment is better between the bottom two? I also see the weapon lands to the right rather to the left or center, is this amendable?

This is the code for what you see based on your above response.

Where are we going? <div style="float: left; padding: 2px 2px 2px 2px;">![[futurecity.png|200]] </div><div style="float: left; padding: 2px 2px 2px 2px;">![[dystopianfuturecity.png|200]] </div><div style="float: left; padding: 2px 2px 2px 2px;">![[spacecraft.png|200]] </div><div style="float: left; padding: 2px 2px 2px 2px;">![[crafttwo.png|200]] </div><div style="float: left; padding: 2px 2px 2px 2px;">![[interior.png|200]] </div><div style="float: left; padding: 2px 2px 2px 2px;">![[weapon.png|200]] </div><div style="float: left; padding: 2px 2px 2px 2px;">![[ground.png|200]] </div><div style="float: left; padding: 2px 2px 2px 2px;">![[controlcenter.png|200]] </div>

Thank you @Jeffurry

1 Like

OK, full disclosure…I don’t really know what I am doing! BUT, I have jiggled around a bit and got this…


… the placement of a carriage-return and some full-stops helps to organise the display of the images. Muck about with it, with a preview window open next to your editor to get the desired effect. Sorry I cant be more expertly helpful.

Where are we going? <div style="float: left; padding: 2px 2px 2px 2px;">![0](https://www.placecage.com/140/100) </div><div style="float: left; padding: 2px 2px 2px 2px;">![0](https://www.placecage.com/140/100) </div><div style="float: left; padding: 2px 2px 2px 2px;">![0](https://www.placecage.com/140/100) </div><div style="float: left; padding: 2px 2px 2px 2px;">![0](https://www.placecage.com/140/100) </div>

..<div style="float: left; padding: 2px 2px 2px 2px;">![0](https://www.placecage.com/140/100) </div><div style="float: left; padding: 2px 2px 2px 2px;">![0](https://www.placecage.com/140/100) </div><div style="float: left; padding: 2px 2px 2px 2px;">![0](https://www.placecage.com/140/100) </div><div style="float: left; padding: 2px 2px 2px 2px;">![0](https://www.placecage.com/140/100) </div>

Hi. I have tested your coded with local files and you have to add line breakes <br/> with large pictures but for the rest it works perfect. This is AWESOME :clap: :clap: :clap:

2 Likes

Fantastic; that’s awesome - thank you @Jeffurry

@Ward - may you please post in some of your amended code? I know nothing about programming so any import visual would help a ton to see what you mean.

1 Like

Hey @joshuawilliam I couldn’t exactly replicate your images setup, since I don’t have the exact images you are using. (feel free to upload them here, if you want me to test it with your exact same setup)

With that said I used your same code with other images just to test.

My test

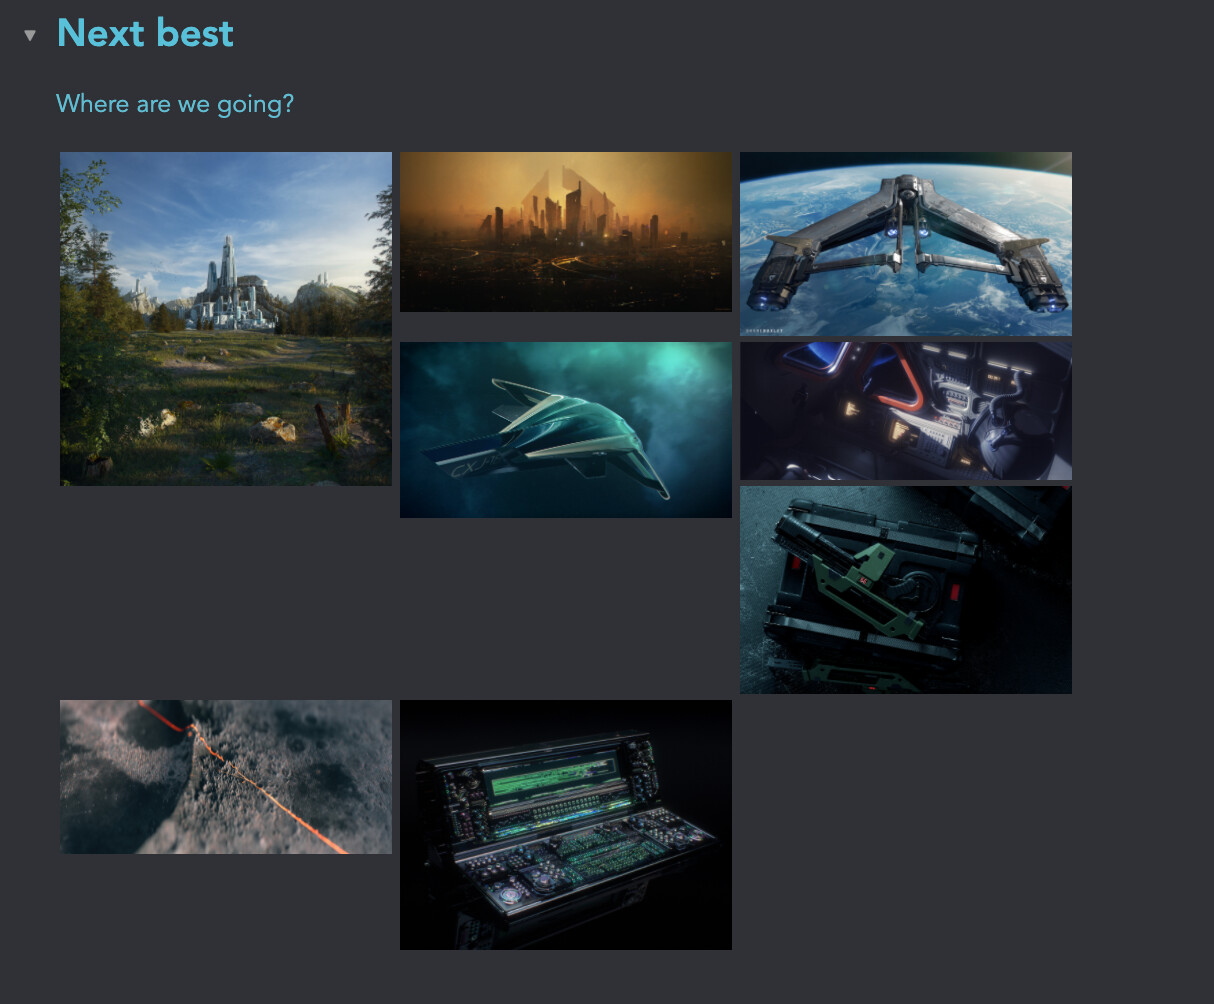
this is what mine looks like (exact same code, different images)

Look at the first image (top left) it’s taking too much space at the bottom

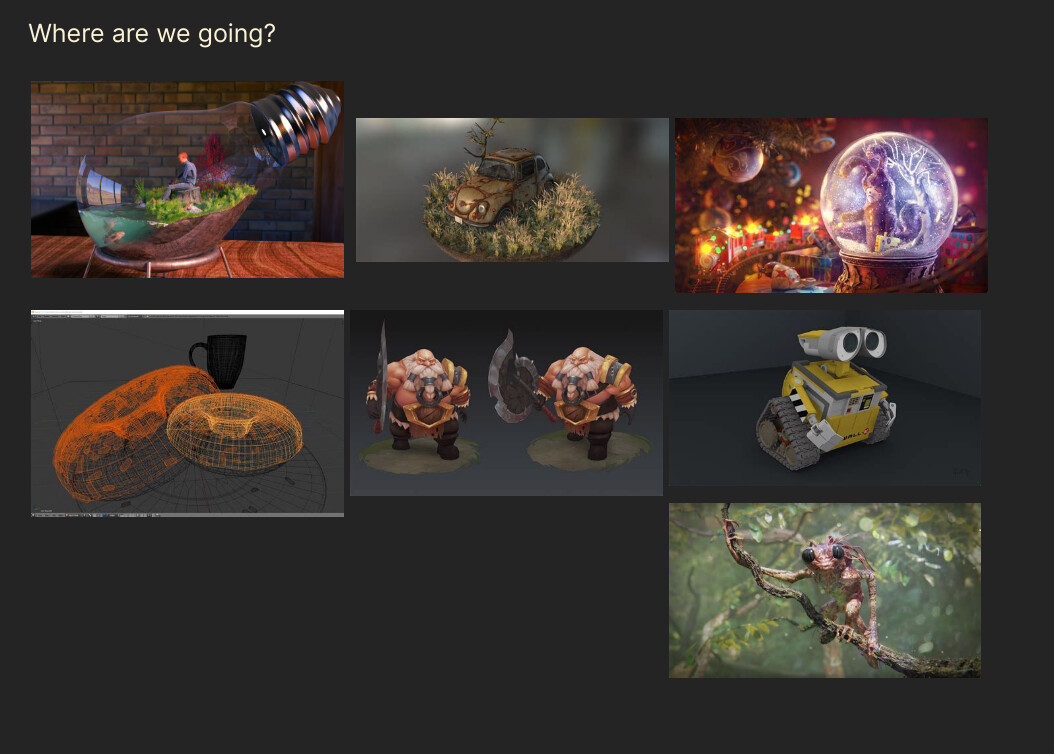
By following @Ward 's recommendation to use <br> I manage to correct into this (look at first photo again)

Now there’s some space in between the first photo and the next row

<br> means break, it’s the same as doing enter or return when writing, it creates a new line of text, in this case code.

Here’s more info on the <br> tag in HTML

In my case this is all I changed

I added <br> after </div> and before <div style=

What does <br> mean?

so the first image’s code looks like this now

Where are we going? <div style="float: left; padding: 2px 2px 2px 2px;">![[futurecity.png|200]] </div><br><div style="float: left; padding: 2px 2px 2px 2px;">![[dystopianfuturecity.png|200]] </div>

that way you can try to add <br> in between </div><div style= to fix those strange gaps.

it’s not perfect and you might find making some <br> makes some other gaps move around.

Feel free to upload your images

It’s a bit tricky to be precise, using the wrong images, so if you’d like some more help with the exact code, feel free to upload your images and I can set it up for you and explain how to best format them.

Easiest way is to put them in a folder and do a .zip to quickly just upload it here in the forum, a Dropbox link (or any other could service) also works

Hope it help!

2 Likes

I found a really clean way to do it with tables it looks like this:

The solution

I used css snippets and the new cssclass to hide the lines made by tables. (This doesn’t affect normal tables, which is great)

that way I simply create it like this:

A simple table

|                          |                      |                       | 
| ------------------------ | -------------------- | --------------------- |
| ![[glass-circle-1.jpg]]  | ![[hover.png]]       | ![[violet-city.png]]  |
| ![[purple-city.jpg]]     | ![[boat-sky.jpg]]    | ![[stone-planet.jpg]] |
| ![[blurry-window-1.jpg]] | ![[red-shape-1.jpg]] | ![[train-sunset.jpg]] |

I made a tutorial

I made a video tutorial, It needs Obsidian version 0.9.18 or higher, which is still for “insiders” only Catalyst early updates

I would assume 0.9.18 should be available for everyone in 1 week or 2 hopefully. Then I’ll make the video public.

(right not it’s an unlisted video on YouTube, for anyone who wants to check it out before it’s published.)

5 Likes

Radical dude, nice work on the tutorial - your second latest reply here is the one to pay attention to. Once I get access to the new version, I’ll get on your method, it seems like the best one yet. Thank you very much.

1 Like

my pleasure man, sounds good! Once 0.9.18 is public, feel free to let me know if you have any questions or issues.

Thanks for sparking the idea, I’m already making use of this method all around my notes, I even have some crazy ideas to expand it’s functionality.

Thank you so much.

Fantastic, Santi. I hope it’s your idea to post those developments
in here [relative to this] as and when they occur. :slight_smile:

1 Like