I’m an Engineering student and a lot of my notes consist of equations. I’m looking for a way to automatically append any equations I write in my lecture notes to a ‘master’ equation list.
Things I have tried
I’ve tried using tags and dataview but i’m still a noob so i’m not that proficient. Any Suggestions?
I really like your layout, but i’m a little confused on how I can implement this into my workflow. Here’s an example of what my notes look like. I basically want the line the tag is on and the line below it to be imported to either a table or a list.
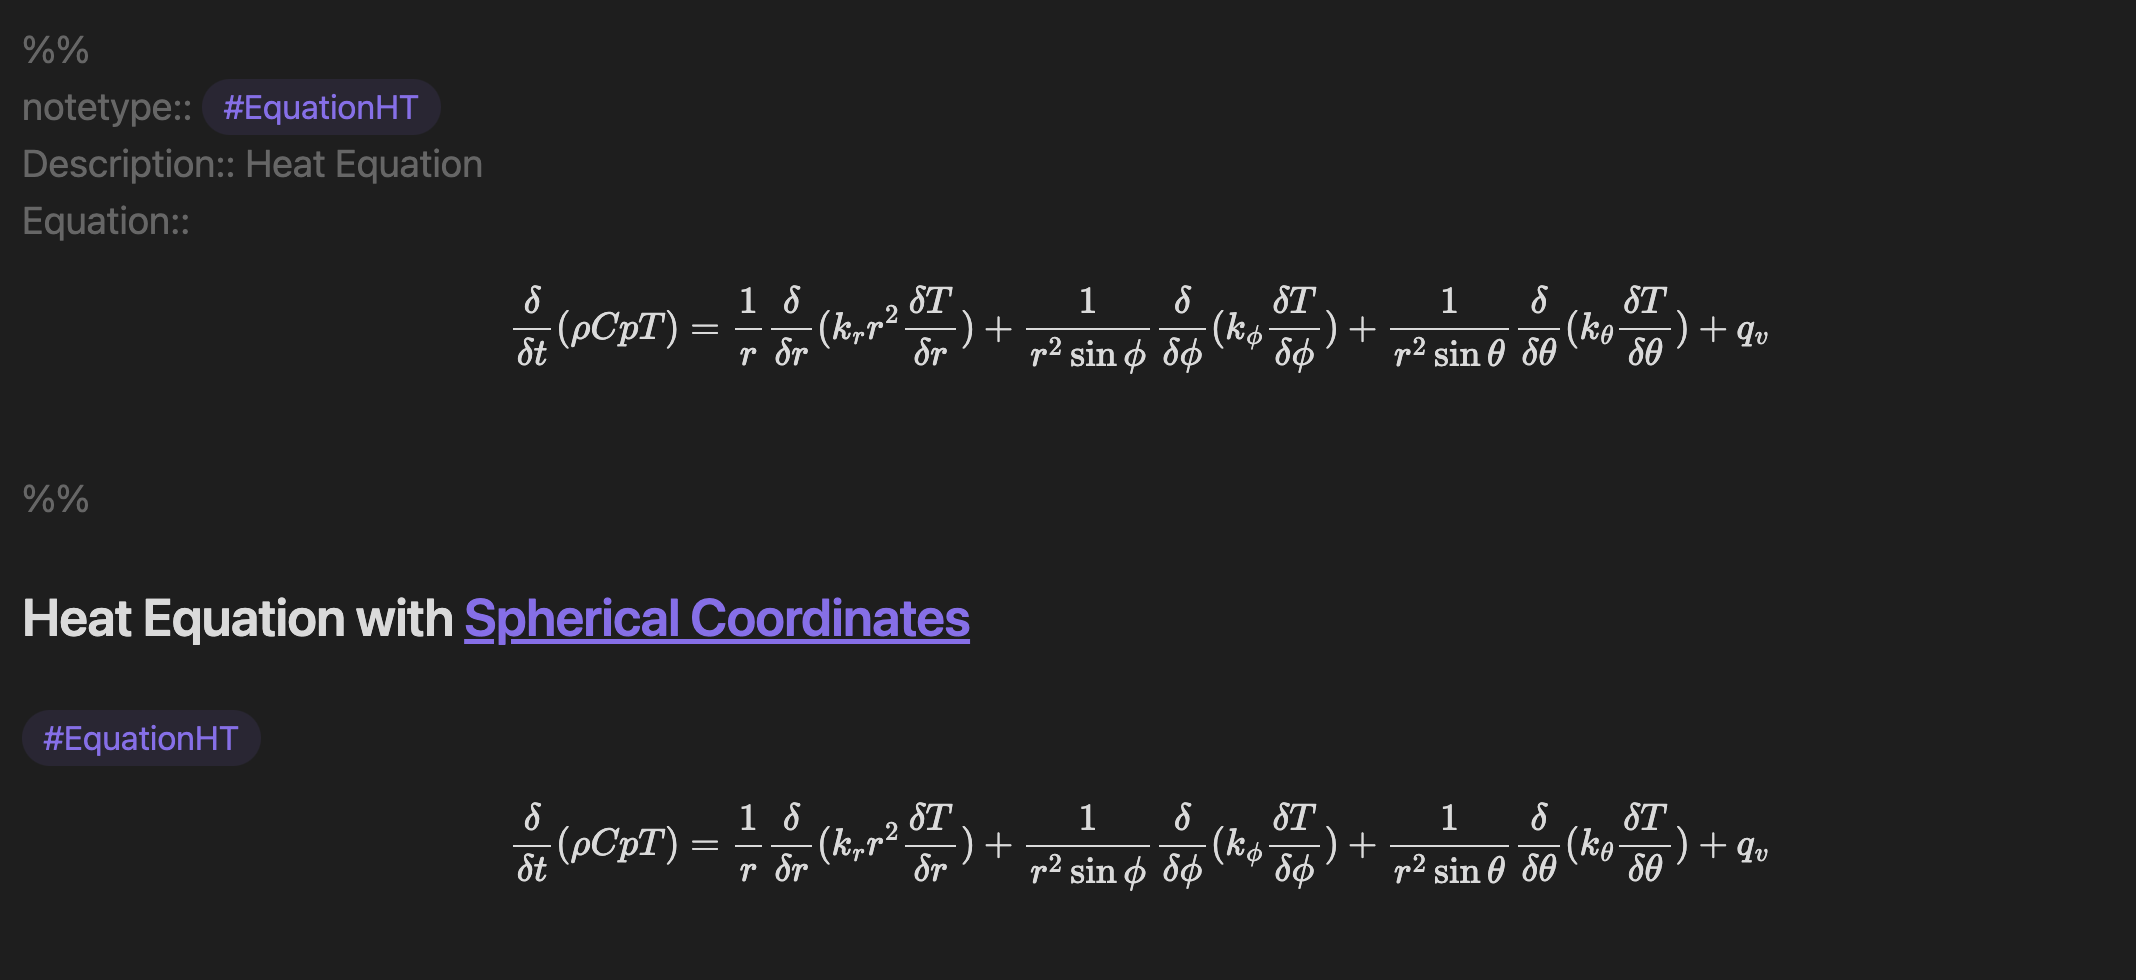
Here is the key thing you have to understand about the state of metadata in Obsidian right now.
You can scope metadata to:
notes (files)
list items
That’s it.
You cannot (currently) scope metadata to single lines, paragraphs, etc. or any other construct or text block within a note file except it if is a list item.
So you have to choose which has the less friction for capture for you: break every formula into its own note, or every formula into a list item (with the lists themselves distributed across multiple notes based topic, chapter, etc.).
Once you have got the information packaged in one of those ways and the tags applied, then the Dataview query to pull them together in a table etc. is trivial. I can share my Dataview code for this (WIP) later if you are interested, but you need to decide how you want to structure the source material.
I’ve opted for the list-item based approach, because there’s still too much friction for me to create a new note when taking down a note. So my queries are list-item based. Which has the unfortunate side-effect of requiring all of my “concept definition”/forumulae to be expressed as a list item. I first thought this might clash with my “atomic” 1 note per concept preference, but most of the times these definitions are all in the “source” or literature layer anyway, and the real “concept” note references the relevant formula using targeted dataview queries (e.g., show me all formula-based definitions of the concept of “topology” from the domain of “phylogenetics” and “math”, in the concept note “topology-in-phylogenetics-vs-math”).
Also, TBH, you can get started with a much simpler scheme.
E.g.,
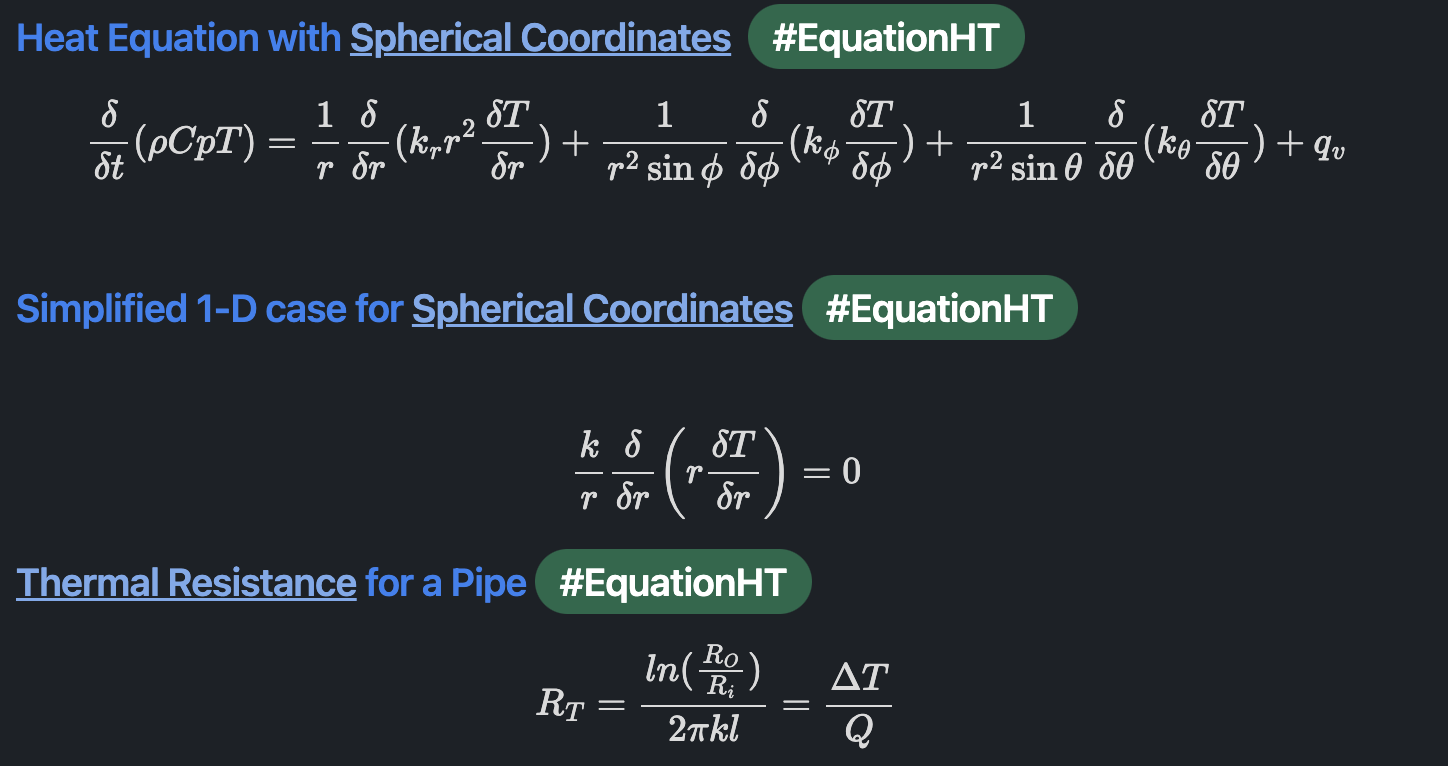
- Heat equation with etc etc etc
  ...
  ...
  #equation/ht
- Some point without an equation
- Another point without an equation
- Another definition
  ...
  ...
  #equation/ht
- Some point without an equation
Then the dataview query is pretty much just selecting those tags. All the inline metadata etc. is just to provide richer information for myself and nicer query results. Not strictly needed.
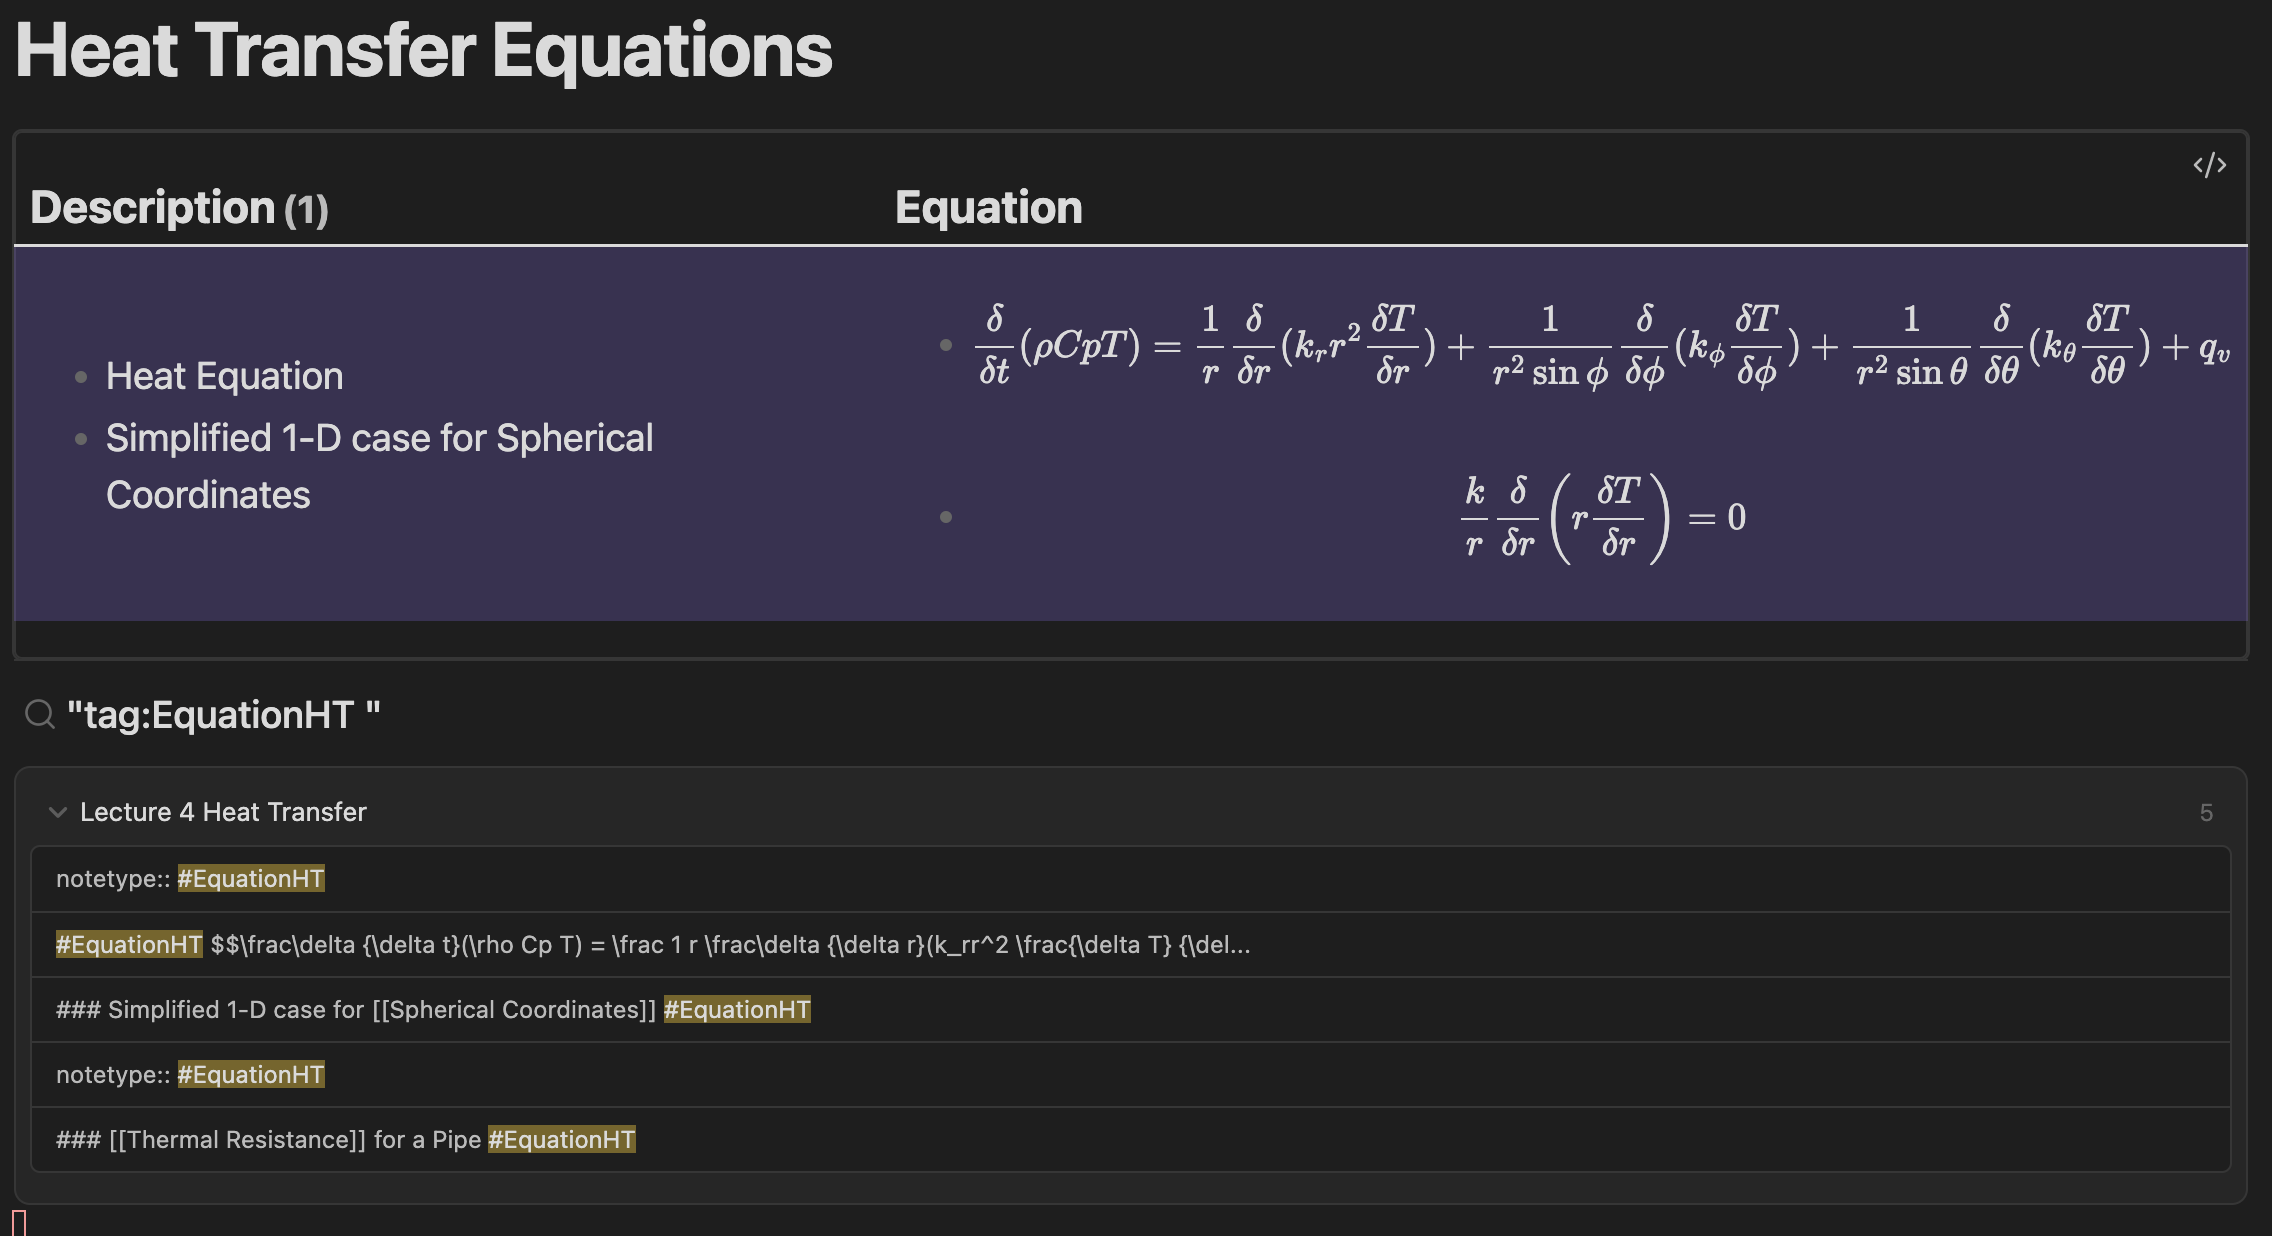
You can effectively scope embedded searches to lines/paragraphs. Technically they apply to the whole note but by default it shows a preview for each match. So you could tag each equation and then for your master equation list do:
~~~query
tag:EquationHT
~~~
But this only captures single lines, so you’d need to put the equation on the same line as the text.
A fancier query with a regular expression can capture the pair of lines:
What that does is match the start of a line, followed by a string of any characters, followed by the tag, followed by 0 or more characters, followed by a newline, followed by a string of any characters.
The tag:EquationHT isn’t strictly needed here, but using the tag: operator searches the tag index instead of all the text so I included it hoping it might speed the search.
The formatting of embedded searches isn’t lovely, in part because of the highlighting on matches. I’ve been meaning to make (or ask for) a snippet to make them look nicer but haven’t gotten around to it.
As an update this is sort of what I have going rn. I’m pretty happy with this result, Now I just have to figure out how to get dataview to format it nicely.
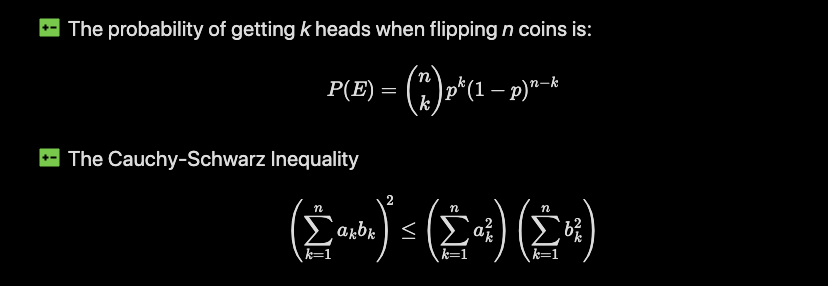
There has been provided some good examples, but I just wanted to chip in with another alternative which I think is rather nice using decorated tasks (or custom checklists ). Using this (with some extra CSS) you can type out your equations like this:
- [E] The probability of getting _k_ heads when flipping _n_ coins is:
$$
   P(E) = {n \choose k} p^k (1-p)^{ n-k}
$$
- [E] The Cauchy-Schwarz Inequality
  $$
    \left( \sum_{k=1}^n a_k b_k \right)^{\!\!2} \leq
    \left( \sum_{k=1}^n a_k^2 \right)
    \left( \sum_{k=1}^n b_k^2 \right)
  $$
It’s optional whether you want the math block fence indented or not, but they do need to be on the following line to be considered part of the task.
This is with the Minimal theme, but the task can be decorated this way with other themes as well. One great advantage of using this type of markup is that you can click on the equation and it’s a natural link to where you defined the equation.
CSS markup for the 'E' tasks
I’ve chosen to use “E” for Equation, but this is of course something you can choose for your own. I’ve also opted for the increase-decrease-fill icon from the free remixicon.com icon set. This can also be changed.
I use decorated tasks like this for multiple cases, but I like how they’re free from clutter like tags or inline fields, and just use that simple icon to visually make it stand out just enough from the normal flow of the text. And the backlink it provides I also think is rather nice!
To get this in your own vault, add the following to a CSS snippet:
Goto Settings > Appearance and scroll down to “CSS snippets” section, and hit the folder icon on the far right. This opens up a file explorer window, in the folder vault/.obsidian/snippets, which is were you want to save your css snippet
In this new window create a file, like myCss.css, where you copy the CSS into. Make sure this actually is a text file, and that the name ends in .css
Back in Obsidian, you should now see your myCss in the list of CSS snippets. If not, hit the refresh button
Final step is to click the enable button to the right of your file, and now your new CSS should be in effect
If you later on make changes in the CSS snippet file, the effect should be immediate. If not, try disabling and re-enabling the snippet, or in some strange cases, you would need to reload Obsidian. In 99% of the cases, the changes are immediate, though.