There is something interfering somewhere. Either the CSS text is changed by something else, or you’ve got some other CSS settings which overrides it. This is just a little strange. So moving forwards, needs navigating the Developer Tools to locate where the culprit are.
But before that, let’s assess where we are:
- The CSS file is correctly named, as it shows up to be enabled in Settings > Appearances > CSS snippets
- The overall CSS file is structurally sound, since the
text-decoration: line-throughat the end of the file, was shown correctly for some element - Something strange with the
color: yellow, since it doesn’t show up for example in the file heading. So something is interfering - And of course, you don’t get the intended changes to the actual outline
Some other suggestions?
Could it be dependant on some other plugins or themes or snippets you’ve installed? Could you try disabling all plugins, themes and other snippets, and see if that’s making a change?
Could you try with this CSS file, which I’m sure does the trick for me?
outline_alignment.css (275 Bytes)
Could you attach the Show debug info from Command palettet, just in order to see if there are something else glaring at us to explain what is happening?
Using Developer Tools for debugging
Finally, to aid you in possibly finding the culprit of what’s interferring we’re going to try to locate where the possible interference is in your CSS. Hope this isn’t too easy (and/or difficult), but I’ve used this kind of debugging a lot lately, to identify which or where the CSS is targeted.
I’m going to explain how to locate why the color yellow is not applied to the file heading, but you’ll hopefully be able to apply to other stuff by the end of the explanation, which can identify where your actual problem arises.
-
Open the Developer Tools, the Elements pane, by hitting Ctrl + Alt + I (or F12) (or going in the View > Toggle Developers Tool), and select the Element pane in the top bar
-
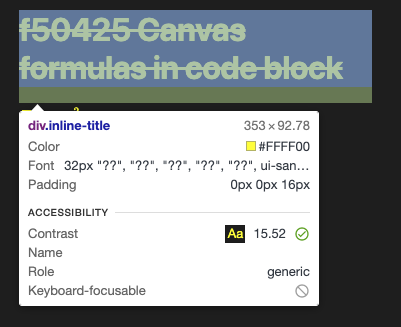
Select the box with the arrow in the upper right, and click on the file name when only the file name is lit up with a blue box, and a popup with the
div.inline-titleshows
-
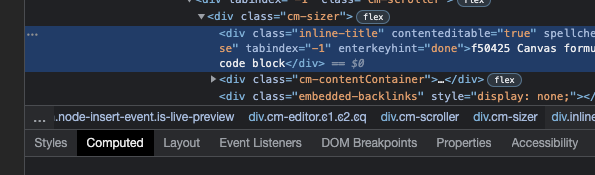
Now the corresponding line should show within the Developer Tools, and you can select the Computed sub-pane below the line.
-
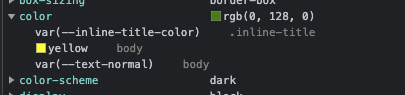
Now finally, we can see why the file name has the given color, by expanding the arrow in front of the color attribute.
-
In my particular case, you can see that it’s not actually yellow due to the
body { color: yellow; }from the CSS file, but somehow it’s yellow due to thevar(--inline-title-color)being yellow.- It turns out that’s due some other strangeness, but I was able to change it in the image above by doing
body { --inline-title-color: green; }
- It turns out that’s due some other strangeness, but I was able to change it in the image above by doing
Now the question becomes, what do you see for margin-left in the Computed section, when you hover the icon of your second sub (the collapse icon)?
I’m hovering here:
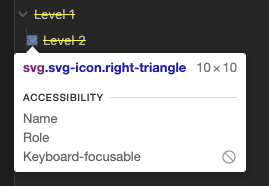
and it shows this:

What does your show?