Obsidian CSS Quick Guide
Hi friends! CSS in Obsidian can be confusing to get into, so this is a guide to get you started with information on the tools, methods, and some background knowledge!
Let’s get started by looking at how you can look behind the curtain of Obsidian’s visuals.
The Developer Console
Obsidian is technically like a website. As such, you can view the source like any other browser.
While you are inside the Obsidian window, you can press ctrl+shift+i to bring up the developer console on the right. It’s a very scary, text-filled rectangle.
It is important to note that any changes you here make are not saved which is why we make CSS snippets. You can mostly undo anything with ctrl+z when testing. If you really messed up, click into the console area and press f5 to reload Obsidian.
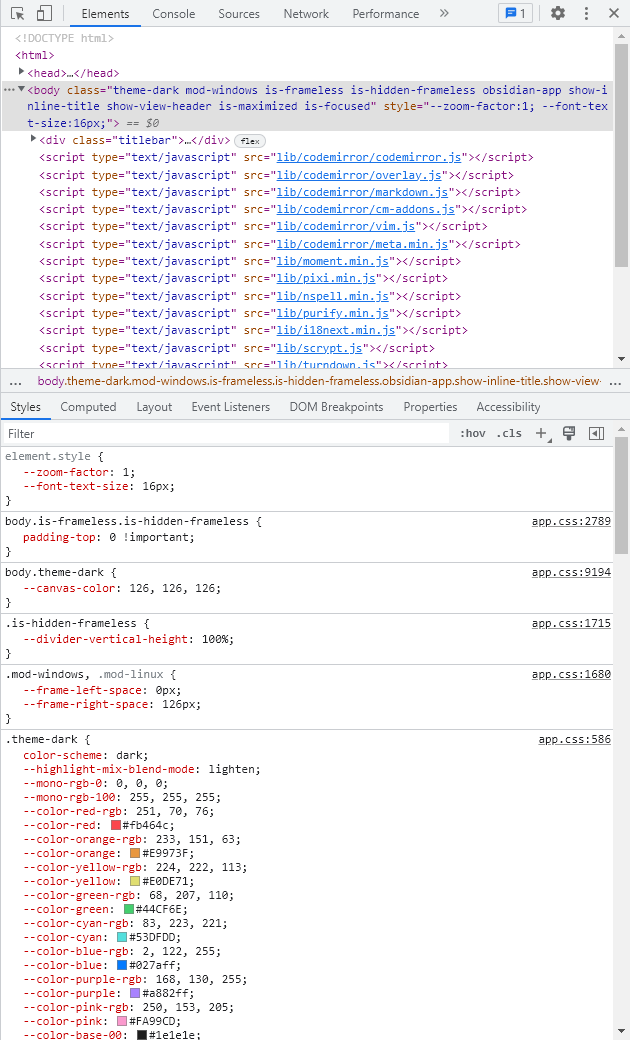
The developer console is the basis for how you can view classes and edit the CSS to test themes. You can resize it by dragging the left edge and it will change in layout past a certain width.
As seen normally
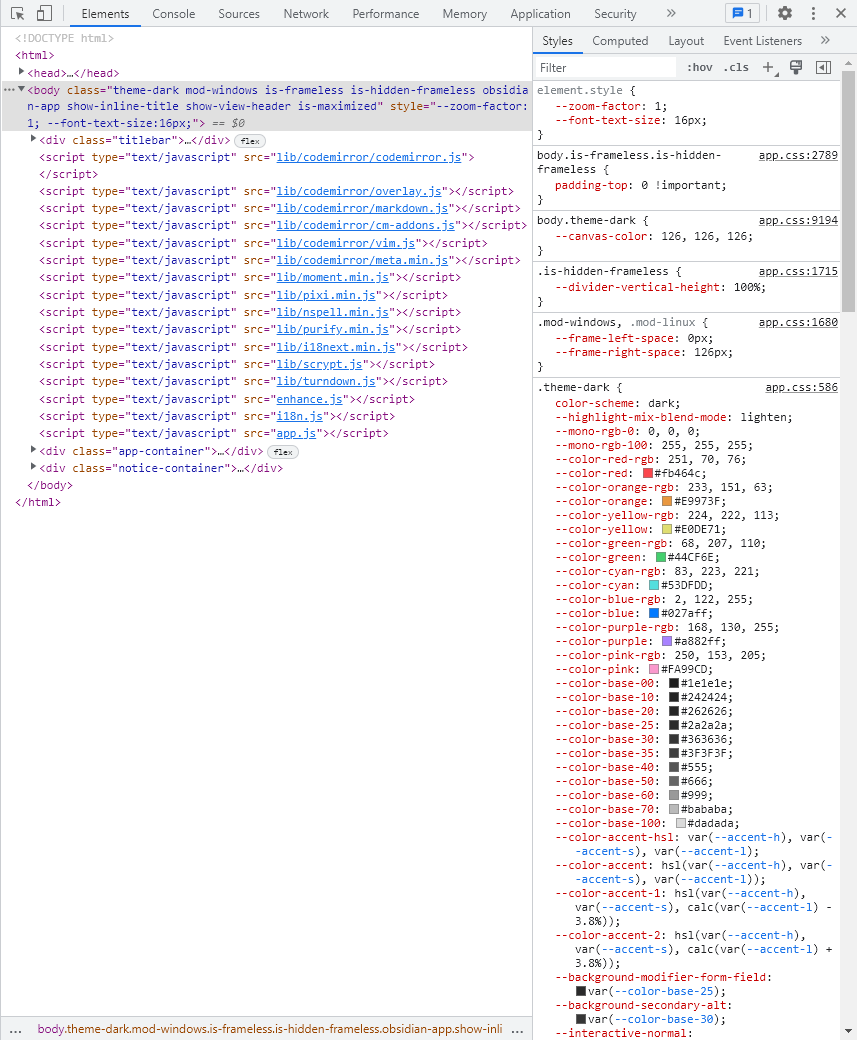
At a certain width, it changes form!
I personally don’t like the changed form as it’s a bit harder to read some CSS. To make it always stay split horizontally, you can go to the gear at the top right and change the Panel Layout from auto to horizontal. I will be using this for the guide.
To close the developer console at any time, you can either press ctrl+shift+i again or click the top right x button.
Anatomy of the Developer Console
The developer console is a very information-dense block, but most of the time the visuals aren’t relevant to where you’re looking. Let’s look at the general areas.
The main sections
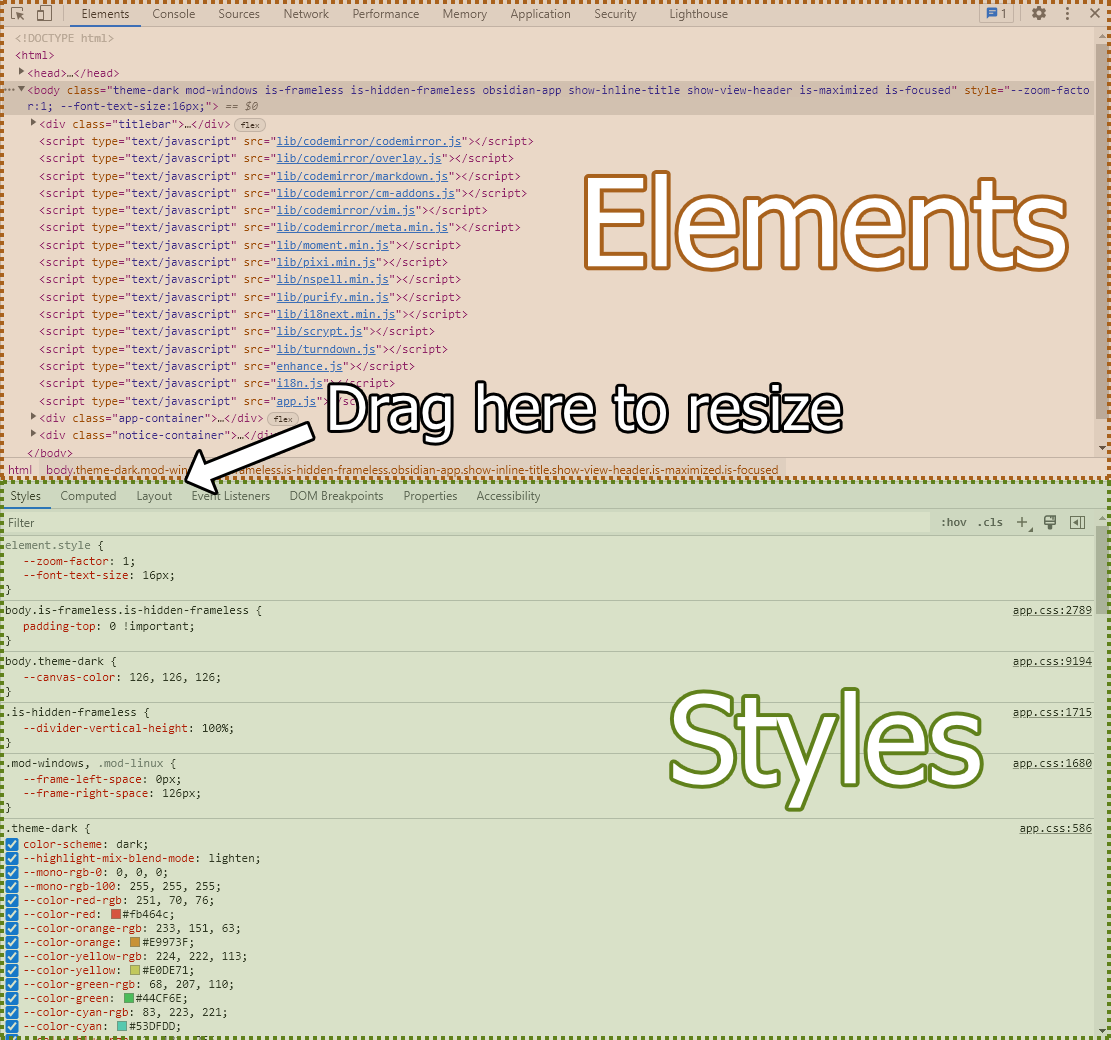
The elements are all the elements that make up Obsidian. There’s a lot of stuff that doesn’t matter to you if you only care about scenes so you can mostly ignore what’s up here until you’ve selected something as you’ll see later. Hovering any elements here will show a highlight of them in the app.
The styles are the CSS selectors and declarations that make Obsidian look cool. We can see a bunch of them at the bottom. Notably, this bottom section entirely depends on what you selecting in the elements section above.
You can drag the area seen in the picture to make the styles section larger or smaller.
Selecting Elements
While you could go in and open all the carats to find your element, there’s a much faster way.
The most important tool you have here is the element selector at the top left. You can click on it or press ctrl+shift+c to pull it up. With this tool, you can hover a part of the app to see it in the elements menu and click to select it. While the tool is active, you can also see some basic information.
Here’s what it looks like when you hover an element:
Element selector in action!

Once you actually click on the element, the basic info and highlighting goes away. The styles section should be on the “Styles” tab, now showing you the actual styles on that element.
The styles
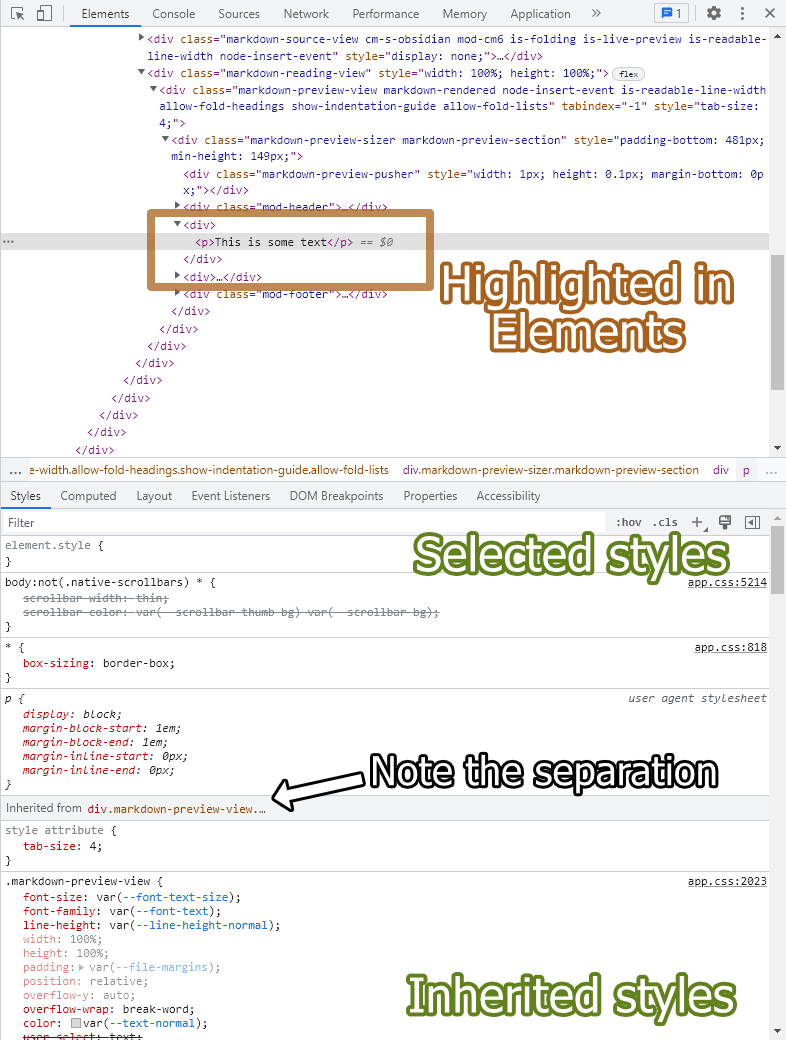
Almost all elements will have some selected styles and inherited styles. I won’t go in depth about CSS selectors as that’s a massive topic, but you can note that our styles show up here.
It is important to note that elements for Editing and Reading modes are different.
An Aside on Classes
On the element, you can see any classes associated to it. These can be selected in your CSS snippet. You might also want to look upwards to parent elements for more selectors.
Some classes

The Computed Tab
Other than the “styles” tab in the Styles section, you can see every style that is affecting an element in the “computed” tab.
The computed tab
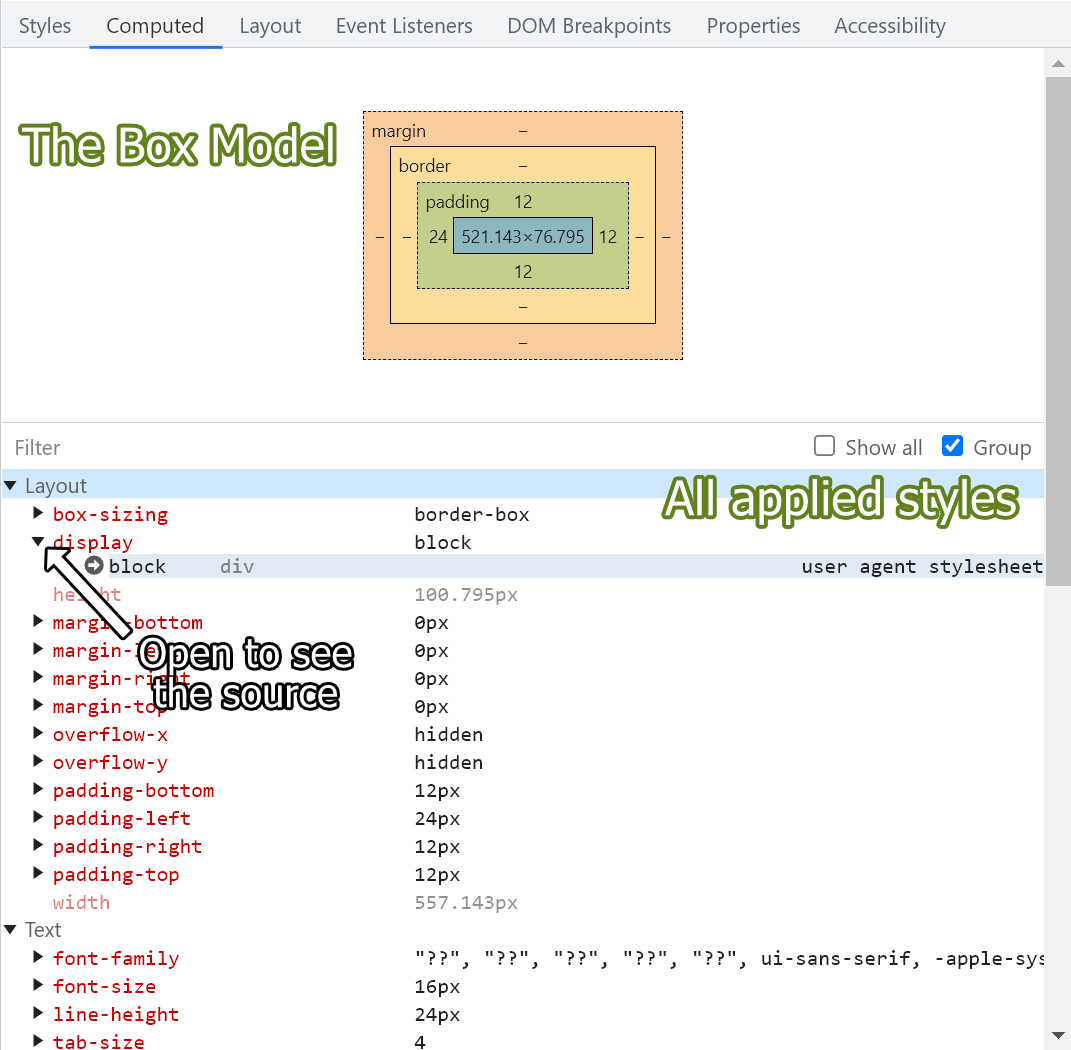
In this tab, you can see the box model of the element (look that one up for more info) and all the applied styles. You can open the carats to see where these styles come from and click the arrow to go to that style in the “styles” tab. This is very helpful when finding which element has the background-color added.
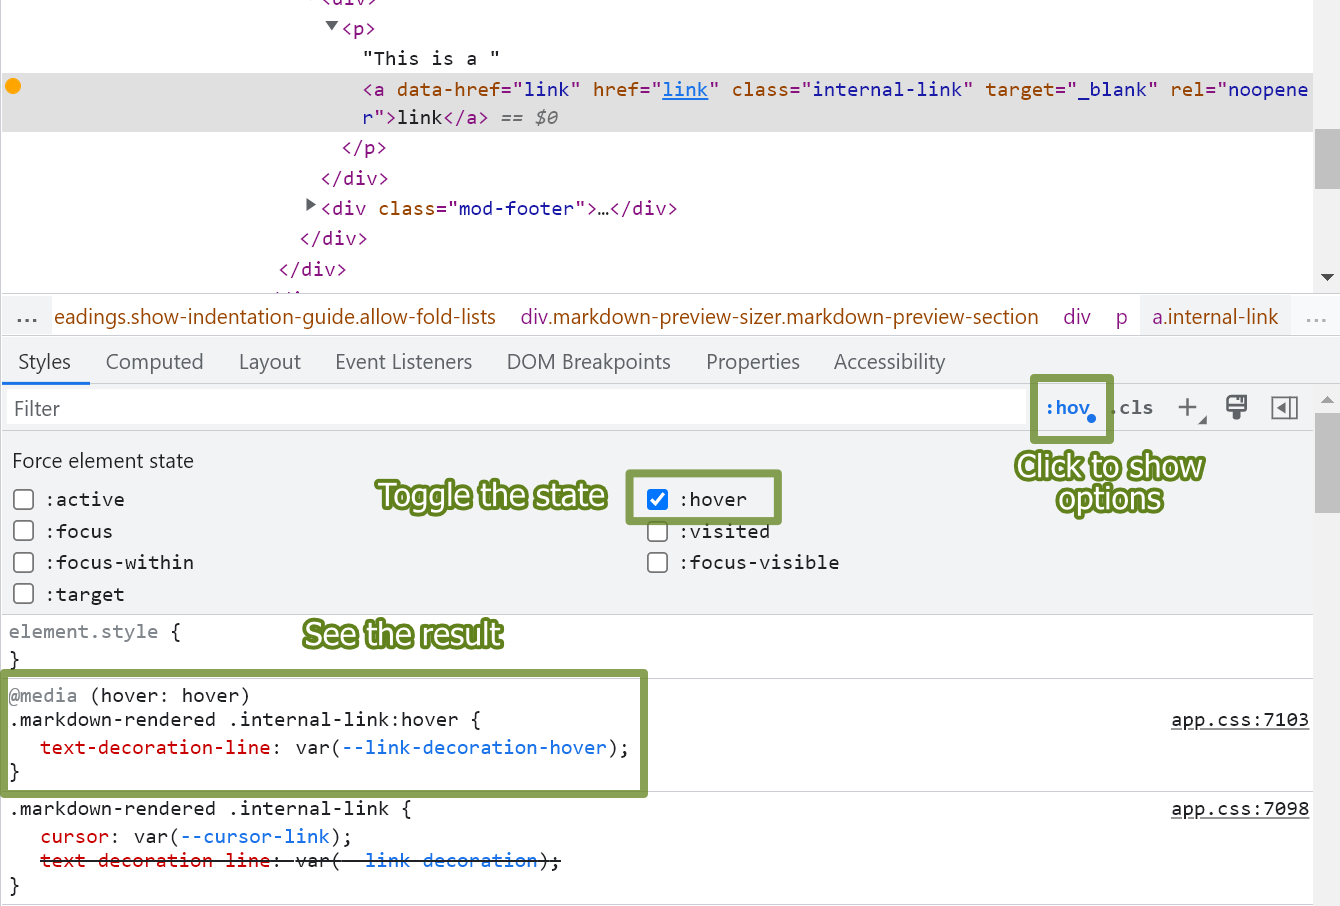
Testing States
Even if you can target an element, its styles for being hovered or selected might not show up! In this case, we can use the Toggle Element State part of the styles section. For this example, let’s say you want to pretend you’re hovering a link in reading mode.
Hovering a link
Addendum
Now you should have a better grasp on the basics of looking around at the elements and their classes. There’s a whole world of writing the CSS, but I hope this helped you poke into debugging and exploring the elements.
I took many steps from Getting comfortable with Obsidian CSS so check that one out as well.
This guide was made by FireIsGood#0733 on Discord. Feel free to share! If you would like to learn some more, check around on the Obsidian forums or come hang out in the #appearances channel on the Obsidian Members Group Discord.
Some random helpful links: