callout handling needs some improvement because it’s too time consuming and repetitive task to add
first, a custom callout to get a header
( with icon and colored box) and then, to prepend ‘>’ for all successive, non-contiguous lines .
Proposed solution
A nice solution would be a form dialog to configure all aspects (box color, icon, title and visibly) and prepend automatically prefixes “>” for all the text blocks below the header
a quicker solution would be to wrap all text blocks in a genetic callout header with prepended prefixes “>” for all text blocks below the header. In this case we only have to change the callout tag to switch to a different (custom ) callout
Ideally, Obsidian should provide both
options as shortcuts for selected text and for text blocks on the clipboard .
Current workaround (optional)
I really enjoy Javalent’s Admonition plugin. Death simple to configure, with fences on top and bottom some reference tag to display the right color, title and icon in one shot and done! core callouts definitely need to be more user friendly.
Well my fault I missed to specify that my data is in the clipboard.
One step would be desirable, to modify a selection is a valid alternative but another case
This is what I do to work with callouts on desktop:
Use a snippets plugin and define a snippet like !co which essentially has this content (| symbolises the automatic placement of the cursor after the snippet’s expansion):
> [!|]
>
>
Or define one for each callout type, e.g. for !note:
> [!NOTE]
>
> |
Get into the habit of using Shift+Return when inside of callouts to always append a new > for each new line (this avoids inserting blank new lines).
Use the middle-mouse button (same as the mentioned Shift+Alt+LMB) to quickly click and drag to help insert a further level of nesting for a contiguous set of angle brackets. Not sure what about it doesn’t work as expected, you do have to be precise about the cursors you insert with your drag however, and the present nesting must already be well formatted.
Better native support for working with callouts would be nice indeed, specifically for inserting them. I agree that when pasting, Obsidian could attempt to precede all paragraphs with a > when the paste itself occurred on a line within a blockquote.
Thanks for sharing in detail how you use callout blocks!
I myself use a quickadd capture macro to insert various custom callouts (with
selected input) and that’s pretty nice but quickadd doesn’t go so far to prepend automatically “>” for each line of the selected input.
need to check that shortcut
regards multiple cursors: in VScode you click on the beginning of line 1, then you alt + shift + LMB on the beginning of, let’s say line 11 and the app places automatically
multiple cursors in between all lines with the same offset.
I’m wondering if I understood right that Obsidian needs the my middle mouse button to place automatically in-between cursors. In my experience, Obsidian places multiple cursors but you’ve to select each line manually - maybe I missed something.
This is my usual callout routine:
I add text blocks from the clipboard,
select my pasted text,
run a quickadd capture macro to wrap the selection with a custom callout ( to get a header, color and icon)
finally I add “>” manually for the lines not affected by the quickadd macro. I didn’t
know about the insert callout shortcut in Obsidian, that’s a nice one.
I’m glad of all this feedback and I think this feature request is still valid because it would be nice if:
Obsidian had a shortcut to format clipboard text blocks
Line by line
adding a generic callout tag like “note”.
So after pasting we only had to change the callout tag to switch color and icon.
The shortcut you mention works for me in Obsidian as you describe for VS Code. No need to select each line separately. Perhaps you have a conflicting hotkey? (Or perhaps I have a plugin which enables this? I just tried in a Sandbox vault and it works there too, so no.)
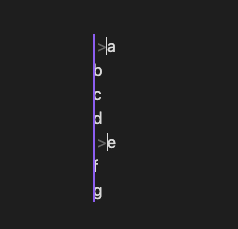
Would be nice to have, I can’t reproduce not even in a sandbox vault. Also my fingers don’t touch anything else than alt + shift + LMB but I double checked and tried again, in both Vscode and Obsidian. Obsidian allows me to place multiple cursors but all manually only. Here’s a screenshot from the sandbox vault and what happens when I select A, then use alt + shift + LMB to select E and finally insert “>”:
Is there any button or toggle to configure multiple cursors ? I didn’t see but 3 irrelevant keystrokes under settings > shortcuts
I use linter plugin. Activate the option that when pasting into quotes to add quotes to the inserted clipboard contents. Works like a charm. There is also an other plugin that can do this, but I already use linter anyways.
Select the callouts is not so hardy, there aren’t a lot of types. But the admonition plugin can help as well as a auto-complete plugin could do that, but forgot which one it was, sorry.